


HTML Basics
<!DOCTYPE html>
<html>

    <head>

        <title>Title of the document</title>

    </head>

    <body>

       <p>Content of the HTML document</p>

        <footer>
            Extra content at the end of the page
        </footer>

    </body>

</html>
Hypertext Markup Language
HTML is only a language for website strucure and is used to display the content. It is usually pared with CSS to make the website be more readable and look pretty. It's a simple and easy language to understand.
Understanding tags and elements
The </> syntax
You can think of a HTML element like a "box" where you can put either content or more boxes inside of them. You create a "box" by writing the start of the element using a tag, and end it with the same used tag with a / slash symbol:
Example of element:
<tag> CONTENT </tag>
When we add more boxes
        <parent>
            <child>
                <p>Wow, HTML is easy!</p>
            </child>
        </parent>
You can see I wrote parent and child. This is to show how elements inside elements are their children. This is actually also what they are referred to as.
Here's a more proper example which you could normally see in a code:
        <div>
            <p>A paragraph <b>inside</b> a div</p>
        </div>
There are also some tags which are called "self closing tags". Examples of these are <br /> (for line breaks) and <img /> (for images)
Here's an example of a self-closing tag:
<img src="smiley.jpg" />
As you can see in the example, the / is now at the end of the element, right before the closing tag. This means they don't need a closing tag.
It is however not required in HTML5 to use the / slash to make the code work.
Attributes
Here's an example showing an attribute. An Attribute is extra information to a tag. This can for example be the URL for an anchor tag or in this case a reference to a CSS class:

Here's an example of an attribute, href, with the value being a URL. The element forms a clickable link.
<a href="https://www.webnode.com"> Click me </div>
You can insert more attributes to the same element, as well as more values. Here's an example showing an element with 2 values separated by a space in between the quotes:
<div class="button button-blue"> Click me </div>
Base document tags explained
You won't need any of these in Webnode projects. This is just to explain the base document as you can see on the top of this article.
<!DOCTYPE html>
- This is a simplified rule in HTML5 that tells the browser that it's now going to read a HTML document, and treat it as such.
<html>
- This tag tells the browser where the HTML code starts. This is the root of the document.
<head>
- This tag is used on top of the document, following the <html> tag. This is the place for metadata, for example where you link external resources (like a stylesheet) or for the website title which is displayed in the tab. Content inside this element is not displayed on the webpage.
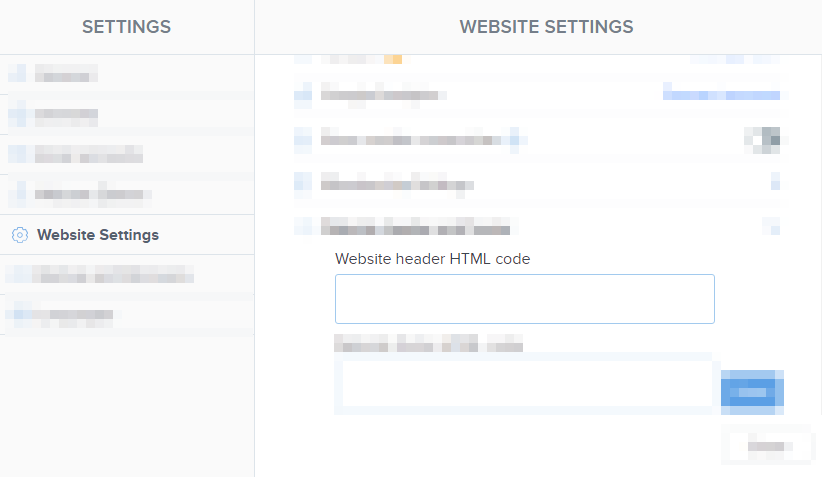
- You can add HTML codes to the <head> by editing the Website header HTML code under Website Settings
<body>
- Here goes the visible content of the website.
<footer>
- This is a tag used for content to be displayed below the websites main content. In Webnode you can add footer content to be below the bottom of the content of the website. This tag doesn't do anything by itself and is not required.
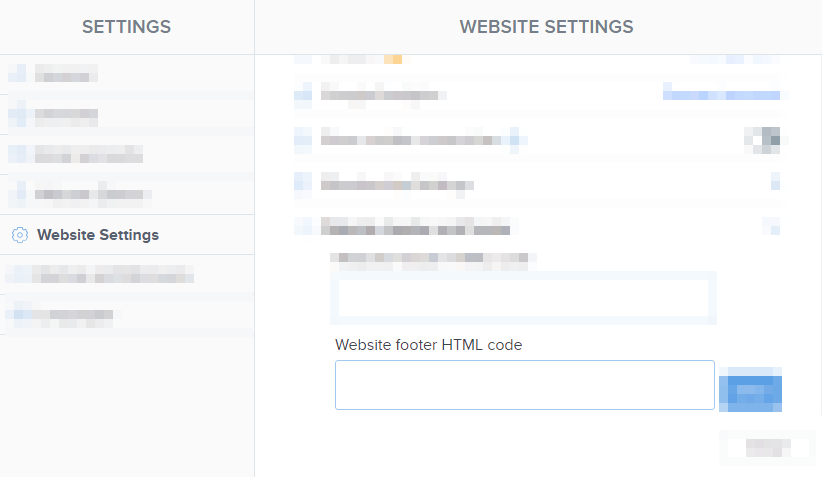
- You can add elements to the <footer> by editing the Website footer HTML code under Website Settings.